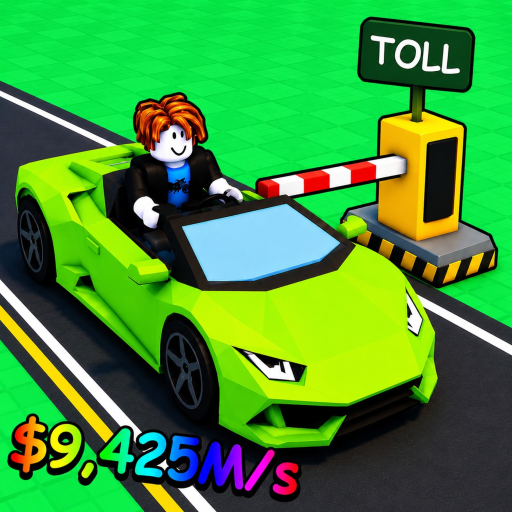
MyTollFarm
First-session guide

My Toll Farm Beginner Guide

Roll once, inspect every label, fill open pads, watch the toll cycle, and buy only the next upgrade whose effect you can read. Official game details and source status rechecked August 19, 2026.

Quick answer

The beginner loop is roll → inspect → place → earn → compare

Every step of that loop is directly visible in public gameplay. What is not visible anywhere yet: roll odds, official codes, or a published best-car ranking. So this guide teaches the decision method that works with the numbers in your own server, and marks every dated observation with where it came from.

The game in one paragraph

What kind of game is My Toll Farm?

My Toll Farm! is an incremental toll-tycoon experience on Roblox, made by the verified group JOFO Games and created on July 23, 2026. Servers hold six players and the official listing says progress saves automatically. The premise fits in one sentence: cars drive up to your barriers, the tolls they pay become your income, and every payment feeds the next upgrade. The official listing also promotes group-join rewards and recommends a private server if you hit lag — both worth knowing before you start.

One-minute version

The core loop, step by step

  1. Roll. Use the central CAR RNG — ROLL prompt to produce a car.
  2. Inspect. Read rarity, name, green value, and orange Cost together.
  3. Place. Stand the car on an open pad facing the toll lanes.
  4. Earn. Barriers open, traffic pays, your cash climbs.
  5. Compare. Weigh the next car against Toll Level, Roll Luck, and Roll Amount — one at a time.
Walkthrough

Your first five minutes, in ten steps

Each step below is something visible in public gameplay checked on August 15, 2026. Nothing here depends on unpublished odds or guessed formulas.

  1. 1

    Spawn in and find your plot

    You start on your own plot with square car pads beside toll lanes. Public gameplay shows a bright, clean layout: pads on one side, barriers on the lanes, cash in the corner of the screen. Take ten seconds to look around before you spend anything.

  2. 2

    Find the CAR RNG pad

    The main interaction point is a central red prompt labelled CAR RNG — ROLL. This is the heart of the game: every car you will ever own starts as a roll here.

  3. 3

    Roll your first car

    Use the roll prompt once and watch the pad. A car appears with a small label stack above it. Do not roll again immediately — the next decision should come from reading, not from reflex.

  4. 4

    Read all four labels before anything else

    Every rolled car shows a rarity tier, a car name, a green money value, and an orange Cost. All four matter. A rare name with a weak green value can be worse than a Common that pays reliably — see the label-reading section below.

  5. 5

    Place the car on an open pad

    Cars stand on the pads facing the toll lanes. Fill every open pad first. Once the pads are full, later rolls become replacement decisions, not free additions.

  6. 6

    Watch one full toll cycle

    Barriers open for traffic and your cash total climbs. Note how long one cycle takes and how much the counter moves. That single observation is worth more than any published number, because it is from your server, at your progression.

  7. 7

    Open the Shop and the Index

    Two buttons sit on the left side of the screen. The sampled gameplay never opens either menu, so their contents are unknown. Shop is a likely purchase menu; Index is a likely collection list. Check both in your own server rather than assuming what they contain.

  8. 8

    Note the x2 Money prompt

    A purchase prompt labelled x2 Money is visible on the right side in gameplay. It is an optional paid boost. Nothing in this guide requires spending, and a beginner session works fine without it.

  9. 9

    Write down your cash, then decide

    Before your first purchase, record your current cash, your weakest occupied pad, and the Cost of the candidate upgrade. These three numbers are the whole beginner decision kit.

  10. 10

    Buy one upgrade at a time

    Change one thing, then watch the next few toll cycles. If you swap a car and a Toll Level in the same minute, you can no longer tell which purchase moved your income.

Label reading

How to read a car: the four labels that matter

Every car in the sampled gameplay shows the same label stack. Beginners lose money by reading only one of the four.

Rarity tier

Four tiers are visible in gameplay: Common, Uncommon, Rare, and Legendary. Rarity is a signal about how often a car tends to appear, not a guarantee of income. In the sampled run, Common cars like Berlingo held pads for hours while rarer cars were still being rolled.

Car name

Names matter for the Index and for spotting repeats. The eight names observed in public gameplay are listed further down this page. Watch for name variants rather than assuming a new name is a new car.

Green value (income)

The green number is what the car pays into your toll income. Combined with the cycle timer, it drives income per second. When you replace a car, this is the number that has to justify the swap.

Orange Cost (payback)

The orange number is what you pay. The beginner question is always the same: how many toll cycles until the green value pays back the orange Cost? You do not need official formulas to answer it — the calculator turns your own two numbers into a payback estimate.

Upgrades

The three upgrade paths, explained honestly

All three panels are visible in gameplay. For each, here is what was observed — and what nobody outside the game can currently promise.

Toll Level

Observed: the next-level preview showed both a multiplier and a cycle timer changing on one purchase. The exact sampled numbers live on the Toll Level and Car RNG page.

Not known: the full cost curve beyond what your own preview shows. Buy it when the visible multiplier-and-timer combination beats a car with the same money.

Roll Luck

Observed: displayed as a percentage that steps up after purchase. See the mechanics reference for the sampled step.

Not known: what the percentage does to each rarity's chance. No drop rates are published, so a bigger Roll Luck number is an upgrade level, not a delivery date for a Legendary.

Roll Amount

Observed: an integer that steps up after purchase, meaning more cars produced per roll action. Sampled step: Toll Level and Car RNG.

Not known: whether extra rolls change luck. Treat it as volume: more labels to read per purchase, useful once your pads and cash flow are stable.

Choosing between the three is a payback question, not a taste question. The upgrade order guide walks the full decision framework.

Screen tour

Every control we could verify

  • CAR RNG — ROLL prompt (centre): produces cars. The game's core button.
  • Car pads (plot): squares where cars stand facing the lanes. Fill these first.
  • Toll lanes and barriers (plot): where traffic pays you. Watch one full cycle early.
  • Shop (left button): likely a purchase menu. The sampled run never opened it, so contents are unknown — check yours.
  • Index (left button): likely a collection list. Same caveat: unopened, so unknown.
  • x2 Money prompt (right): visible optional purchase. Skip it while learning.
  • Upgrade panels: Toll Level, Roll Luck, Roll Amount — each shows a preview before you buy.
Early roster

Cars you will meet first

Eight car names are visible in public gameplay. Rarity notes below come from one dated session and can shift with updates.

  • Berlingo · Common
    Seen from the first half-hour of the sampled run; an early workhorse.
  • Tinbox Alpha · Common
    Appears alongside Berlingo in early gameplay.
  • Reliable Beige Sedan · Common
    Still occupying pads deep into the sampled run.
  • Pocket Crossover · Common
    A frequent early roll; later overtaken in the same session.
  • Royal Yellow Car · Uncommon
    Visible around the one-minute mark of the sampled run.
  • Secret Agent SUV · Rare
    Visible from roughly the fifteen-minute mark.
  • Brickhouse 4x4 · Rare
    Appears later in the sampled run alongside the SUV.
  • Streetzilla 35 · Legendary
    The single Legendary observed, around the 150-minute mark.

Full name-and-label index: the observed car index.

Common mistakes

Six early cash traps

Chasing the rarity color

A rarer color feels like progress, but the payback math lives in the green value and orange Cost. Replace a car only when the visible gain is one you can read.

Copying dated prices

Costs and values visibly climb as a run progresses, and they can change with updates. Numbers quoted anywhere — including this site — are snapshots. Read your own server.

Buying two upgrades at once

Two changes in one minute destroy your before-and-after comparison. One purchase, one observation, then the next decision.

Rolling without a plan

Every roll carries a Cost. Once your pads are full, rolling is a replacement search — check whether the expected gain justifies the roll price before you tap.

Ignoring the timer on Toll Level

The sampled Toll Level preview shows both a multiplier and a cycle timer. A shorter timer can matter as much as a bigger multiplier, because income per second depends on both.

Trusting invented odds

Searches for this game already surface pages with made-up drop rates and fake codes. If a page cannot say where a number came from, treat the number as decoration.

FAQ

Questions new players actually ask

Is My Toll Farm! free to play?

Yes. It is a normal Roblox experience you can join from the official game page. Optional purchases exist — an x2 Money prompt is visible in gameplay — but nothing in the beginner loop requires spending.

Does My Toll Farm! progress save?

The official Roblox listing states that progress saves automatically. Log back in and your plot should be as you left it.

How do car pads and toll lanes work together?

Cars placed on pads face the toll lanes. Each time traffic passes through the barriers during a toll cycle, every occupied pad collects toll income. Keeping all open pads filled with cars is the fastest way to maximize your early cash flow.

What is the best car in My Toll Farm?

No universal best car is provable yet. Odds and full balance data are not published, so the honest answer is a method: compare the green value against the orange Cost for the cars actually in front of you. The observed car index records the eight publicly observed cars from one sampled video instead of inventing an S-to-F chart.

What does Roll Luck do?

Roll Luck displays as a percentage. What that percentage does to rarity odds is not published, so treat it as an upgrade level, not a promise of Legendaries. Sampled step: /wiki/toll-and-rng.

What does Toll Level do?

Toll Level shows a next-level preview with a multiplier and a cycle timer. Read that preview in your own server before buying, because balance can change with updates. Sampled preview: /wiki/toll-and-rng.

Who made My Toll Farm! and when did it come out?

The verified creator group is JOFO Games on Roblox. The experience was created on July 23, 2026, and Roblox schedules NEW UPDATE from August 21 at 17:00:33 UTC through August 28 at 17:00:33 UTC with the note "Fix some stuff".

Can I play with friends?

Servers hold six players, and the official listing suggests trying a private server if you experience lag. The sampled footage shows one player's plot; how neighbouring plots interact was not captured, so check in game.

How this was checked

Evidence, not vibes

Where the facts come from

Game identity, creation date, server size, saving, and the scheduled August 21–28 UTC NEW UPDATE event come from official Roblox records and the verified JOFO Games group. Car names, rarity labels, upgrade panel behaviour, and the four-label format come from frame-by-frame sampling of public gameplay.

What we refuse to invent

No drop rates, no odds curves, no working codes, and no universal best car — because none of those are published anywhere verifiable yet. If a number on this page has no source in the paragraph above, treat it as an error and use the contact page to flag it.

Back to all guides

Calculate income

Turn your recorded numbers into a payback estimate.

Choose the next upgrade

The full car-vs-toll-vs-roll decision framework.

Recognize observed cars

Match names and rarity labels from the sampled run.

Check rebirth before resetting

Public gameplay reports conflict on rebirth values. Use the in-game confirmation screen.

Check the RFID phrase

A video title and spoken comment mention RFID, but no item, upgrade, or requirement is verified.

My Toll Farm Script

Copy the current loader and turn on auto roll.